
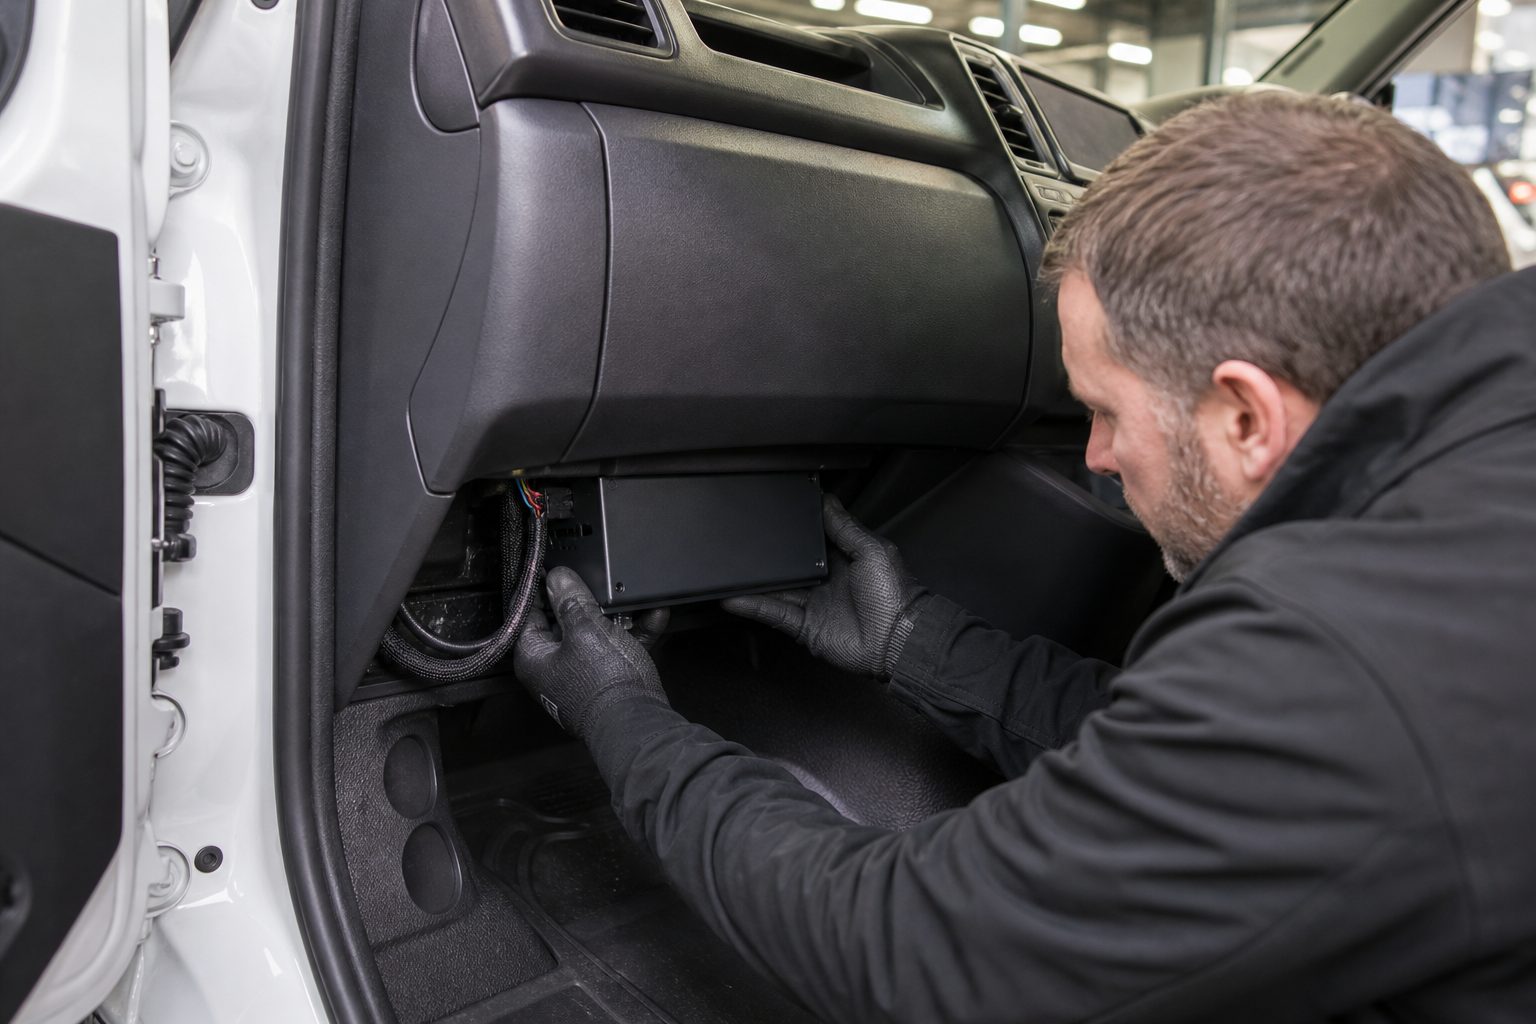
Yes — a competent DIY or a trained fleet technician can install most MDVRs in vans and LGVs; follow safety rules and check warranty and insurer conditions.
Estimated time: 1–3 hours per vehicle (varies by monitor/cameras/roof work).
Skill level tags: DIY (intermediate). Recommended pro: certified auto-electrician for complex installs or fleet rollouts.
Risk: If you’re not confident with vehicle electrics, stop and call a fitter. Incorrect wiring can drain batteries, void warranties or create safety risks.
Bad wiring, poor antenna placement and rushed commissioning create predictable failures: dropped recordings, lost evidence, interference with radios and, in some cases, voided warranties. Fleets depend on consistent footage for claims defence, driver coaching and incident response — a poor install undermines that value.
This guide gives you a full parts list, wiring diagrams for constant/ignition/ground/fuse, antenna and camera placement best-practice, a commissioning checklist, testing flows and troubleshooting tables — all aimed at fleet managers, workshop techs, competent DIYers and installers for vans & LGVs.
“We see installs ruined by one missed earth or a poor antenna position — this guide stops that.”
Featured snippet: An MDVR (Mobile Digital Video Recorder) records multiple camera streams in a vehicle, stores video to HDD/SSD or SD, and can connect to GPS and 4G for location and remote access.
Differences vs other systems:
In vans: less internal space, more metal obstructions; roof racks and shelving can block antennas and camera views; higher vibration and temperature variability mean SSDs are often better for high-vibe vans.
Block diagram (steps):
Power flows:
Antenna roles: GPS supplies location/time; 4G enables live view and uploads. Mounting strongly affects signal quality.
Storage & recording logic: circular overwrite; triggers include ignition, motion, impact/G-sensor and schedule; retention depends on bitrate, channels and storage size.
Thermal & vibration constraints: HDDs are cheaper but vulnerable to vibration; SSDs cost more but are better for vans with racks or compressors.
Practical note: parking mode drains battery if constant 12V is connected without a low-voltage cutoff — use a VSR or smart power module.
| Characteristic | HDD | SSD |
|---|---|---|
| Vibration resistance | Low | High |
| Cost per GB | Low | Higher |
| Typical retention per 1TB | Higher (cheaper) | Lower (more costly) |
| Suitable for vans with racks | Risky without anti-vibe | Recommended |
| Item | Spec / Example | Why needed |
|---|---|---|
| MDVR main unit | Model matched to channels | Core recorder |
| Cameras | FOV/IR/DMS as required | Multi-angle coverage |
| Power harness | Manufacturer harness or hardwire kit | Connects to vehicle power |
| GPS antenna | Active puck or threaded mount | Location/time stamps |
| 4G antenna | External roof or high-cab mount | Reliable signal |
| SIM card | Data plan, nano/micro as required | Remote upload/live view |
| HDD / SSD | 256GB–2TB (SSD recommended for high vibration) | Storage & retention |
| Grommets & sealant | 12–20mm for roof/bulkhead holes | Weatherproof cable pass |
| Cable ties / clips | Nylon, vibration-rated | Secure routing |
| Screws / rivets / rivnuts | Stainless where exposed | Mechanical fixing |
Must not forget: SIM & inline fuse — no SIM = no remote, no inline fuse = fire risk.
Check if the manufacturer requires certified installers for warranty validity — check your manufacturer manual.
Check insurer requirements for camera footage use. GDPR: record only what is necessary, define retention policies and display signage where required. See ICO guidance on workplace monitoring for guidance.
Do not place monitors or devices that block driver view. Windcreen-mounted items must comply with current UK rules — check latest guidance.
Use a voltage-sensing relay (VSR), smart power cut-off or low-voltage cutoff module to avoid battery drain. Test overnight.
Fleet manager worry: Will this affect my MOT/roadworthiness?
Answer: Properly mounted, not obstructing view and with secure fixings = fine. Always check latest guidance and retain installation records.
Installer tip 1: Avoid mounting on cheap metal shelves — unmanaged vibration shortens hard-drive life; use a shock-absorbing mount (fleet MDVRs typically hold HDDs in spring-suspended drive holders).
Some pucks depend on a metal ground plane — roof mount with bonded base is ideal where required.
YouTube tip: If you must mount inside the cab, move antenna to A-pillar area and avoid metallic sun visors.
Note: wire colours vary by manufacturer. Always verify with the supplied wiring diagram.
| Function | Typical wire colour | Connection point | Notes |
|---|---|---|---|
| Constant 12V (battery +) | Red / Yellow | Direct to battery via fused feed or fused slot | Powers parking mode; use inline fuse sized per manufacturer |
| Ignition-switched 12V (ACC) | Yellow / Blue | Ignition-switched fuse (ACC) or harness | Signals vehicle ON/OFF |
| Ground (chassis) | Black | Bare metal chassis or battery negative | Shortest possible route; remove paint |
| Reverse trigger | Green | Reversing lamp circuit | Auto-switch to rear camera on reverse |
Example wiring: Battery + → VSR → MDVR constant +. Ignition → relay coil to switch MDVR power. VSR cuts when voltage drops below threshold to protect vehicle battery.
For vehicles with heavy vibration, soldered joints with heatshrink are most secure. Quality crimp connectors are acceptable when done correctly with proper tooling and inspection.
Common error: “Connected constant to ACC and killed batteries overnight.” Symptom: device in parking mode pulling constant power. Fix: verify wiring, move to correct ACC tap or add VSR.
| Camera Type | Purpose | Mount location example | Angle notes | Common mistakes |
|---|---|---|---|---|
| Front | Capture road ahead & plates | Behind rear-view mirror, centre | Tilt to include bumper & road; lens height ~0.5–1.0m | Too steep angle missing plates |
| Rear | Capture rear collisions & reversing | Above number plate or on tailgate | Slightly downward to include bumper & lower road | Mounted too high missing low impacts |
| Side | Kerbside & blind spots | A-pillar, side panels or wheel arches | Aim parallel to vehicle length showing near-side traffic | Obstructed by racks or sliding doors |
| DMS (driver) | Driver monitoring & behaviour | Above rear-view mirror or A-pillar | Capture face without blocking view | Too low covering driver view or too intrusive |
Example: Courier van with ladder rack — front camera partially obstructed; solution: raise camera slightly or add a side camera to capture kerbside interactions.
| Channel | Resolution | Framerate | Bitrate (per channel) |
|---|---|---|---|
| Front | 1080p | 25–30fps | 4–6 Mbps |
| Rear | 720p | 25fps | 1.5–3 Mbps |
| Side | 720p | 25fps | 1.5–3 Mbps |
Network testing: ping device from portal, check upload speed and live-view latency. Use phone hotspot to rule out SIM issues.
Common pitfall: APN misconfiguration is the most common reason units won’t connect — copy provider APN exactly.
Data cost: remote uploads and high-bitrate streaming increase monthly SIM costs. Consider event-based upload or hybrid modes.
Sign-off sample text for portal: “Commissioned by [Technician], [Date]. Unit [Serial]. Cameras aligned and tested. Sample clip uploaded. Vehicle reg: [ABC123].”
| Symptom | Likely cause(s) | Diagnostic step | Fix |
|---|---|---|---|
| No power to MDVR | Blown inline fuse, bad connection, weak battery | Check inline fuse at battery, measure voltage at MDVR harness | Replace fuse, rewire correctly, charge/replace battery |
| Intermittent recordings | Loose ground, poor ACC tap, HDD fault | Wiggle harness, check ground continuity, inspect HDD SMART | Re-crimp/solder, move ACC to proper fuse, replace HDD with SSD |
| No 4G connection | Wrong APN, poor antenna position, inactive SIM | Test SIM in phone, check APN, swap antenna to magnetic test | Configure APN correctly, move antenna to roof, replace antenna/SIM |
| Video noise/interference | Poor shield, cable near high-current wiring | Inspect cable route and shielding | Re-route cable, add ferrite cores, replace shielded cable |
| Parking mode drains battery | No low-voltage cutoff or VSR | Disconnect constant and monitor overnight | Install VSR or smart power module and set thresholds |
Diagnostic tools: multimeter, laptop for logs, known-good antenna and SIM, replacement SSD/HDD for isolate tests.
Voice-of-customer: “If it cuts out after 30 minutes, it’s usually a voltage-sensing threshold set too low.” Check VSR settings first.
| Interval | Tasks |
|---|---|
| Weekly | Visual check of cameras and antenna; verify MDVR status LEDs |
| Monthly | Firmware & portal health check; clean lenses; inspect cable clips |
| Quarterly | Storage health (SMART), battery load test, review event recordings |
| Annually | Full system test & sign-off; replace worn grommets & seals |
Disk health: run SMART checks monthly; replace HDDs showing reallocations or bad sectors. SSDs: monitor NAND health and TBW. Backup config before firmware updates.
Incident handling: secure vehicle, remove media to copy or hold evidence, log chain-of-custody and upload copies to secure portal.
Download maintenance checklist (PDF)
| System type | Typical use case | Pros | Cons | Best for |
|---|---|---|---|---|
| MDVR (multi-channel) | Multi-camera fleet vehicles | Multi-angle evidence, local retention, parking mode | Installation complexity, storage maintenance | Fleets needing robust evidence & parking recording |
| Single-channel dashcam | Solo drivers, budget | Cheap, quick install | Single view, limited evidence | Solo drivers, low budget |
| NVR with IP cameras | Vehicles with complex arrays | Flexible placement, high res | Network cabling and PoE management | Depot vehicles with multiple cameras |
| Cloud-first dashcams | Remote upload + alerts | Immediate cloud access, easy retrieval | High data cost, reliant on connectivity | Fleets needing instant alerts |
| Hybrid MDVR + LTE backup | Local + remote incident upload | Local recording + remote upload | Higher cost + data | High-risk sectors |
Decision matrix (quick):
“Cloud cams sound great until you see the SIM bill.” Budget monthly data and storage replacement costs accordingly.
Illustrative ROI: if one prevented claim/year (~£1,500) and install cost £1,200, the system can pay for itself in ~1 year (ignoring SIM & maintenance). Get a site-specific quote.
| Risk | Mitigation |
|---|---|
| Installation cost/time | Get itemised quotes; plan fleets in batches |
| Battery drain | Use VSR / low-voltage cutoff; monitor battery health |
| Data privacy / GDPR obligations | Define retention policy; signage and secure access |
| SIM/data costs | Use event-based uploads or hybrid strategies |
| Storage failure (HDD) | Use SSD for high-vibe vans; monitor SMART health |
| Firmware bugs | Backup config; stage updates on test vehicle |
| Vandalism / theft | Use lockable boxes and tamper-proof fasteners |
| Chain-of-custody issues | Log all access; use portal with audit trail |
We don’t sugarcoat — this hardware needs maintenance or it will quietly become useless. Mitigations are practical and procedural.
Mini-case combos: MDVR + telematics = event correlation for courier fleets. MDVR + driver ID = driver accountability for regulated operations.
| Item | Typical range (UK) |
|---|---|
| Single-channel dashcam (device + simple fit) | £100–£350 |
| Multi-channel MDVR (unit + cameras + SSD, basic fit) | £900–£2,000 |
| Premium hybrid MDVR (LTE, SSD, pro install) | £2,000–£4,500 |
Get an itemised quote — labour hours vary by vehicle and site constraints.
Problem: night-time thefts and poor evidence from single cameras. Fix: rollout MDVR with SSD and external IR on 50 high-risk vans; documented commissioning. Result: 12 recoveries and 35% drop in claims first year. Takeaway: SSD + IR + commissioning reduced disputes.
Problem: poor 4G due to interior antenna under rack. Fix: moved antenna to threaded roof mount and sealed feed-through. Result: live-view latency reduced from 45s to <8s. Takeaway: antenna placement often the single biggest fix.
Problem: HDD failures after months due to compressor vibration. Fix: replaced HDD with industrial SSD and added anti-vibration mount. Result: no further storage failures. Takeaway: high-vibration environments need SSD + anti-vibe mounts.
Subject: Quote request — MDVR install for [vehicle reg]
Body:
Vehicle type: [Make/Model/year]
Number of cameras: [Front/Rear/Side/DMS]
Desired features: [Parking mode, live view, ADAS]
Access available: [Workshop / On-site]
Preferred schedule: [Dates]
Please include: itemised hardware, labour, commissioning, warranty.
Short: Yes if competent with vehicle electrics; otherwise hire a pro.
Expanded: If you can identify ACC/constant fuses, use a multimeter, solder/crimp correctly and route cables without interfering with airbags, you can DIY. For ADAS calibration, warranty-required installs or large fleets, hire a certified installer.
Short: It can if parking mode is on without battery protection.
Expanded: Use a voltage-sensing relay (VSR) or smart power module to cut power when voltage drops. Test overnight and configure parking timeout and low-voltage cut thresholds.
Short: For live view and remote upload, yes; for local-only recording, no.
Expanded: SIMs enable remote live view, alerts and clip upload. Choose a data plan and configure APN. Test SIM in a phone before fitting.
Short: Depends on storage and settings — typically 7–30 days.
Expanded: Retention = storage capacity / total bitrate. Use overwrite policies and archive important incidents to cloud or local server to extend retention.
Short: Yes if ADAS cameras are used.
Expanded: ADAS cameras may require static or dynamic calibration. Follow manufacturer instructions; incorrect calibration causes false alerts.
Short: Correctly fitted and not obstructing view = usually fine; check docs.
Expanded: Some manufacturers require certified fitters for warranty. For MOT and roadworthiness, ensure devices and cables do not block driver view or interfere with safety systems.
Short: SSD + correct power management + commissioning.
Expanded: SSDs resist vibration; verify power feeds and parking mode behaviour; run commissioning tests and maintain a schedule to detect issues early.
Short: 1080p @25–30fps for front; 720p acceptable for sides/rear.
Expanded: Higher resolution improves plate legibility but uses more storage and data. Start with 1080p front, 720p elsewhere and adjust bitrate for legibility.
MDVRs suit fleets that need multi-camera evidence, parking mode and local retention. They deliver robust multi-angle footage but only when installed, commissioned and maintained correctly. If you can commit to correct installation, battery protection and periodic checks, an MDVR will improve claims handling and driver coaching.
Next steps: get in touch if you prefer a certified technician to handle the install.
Tell us what vehicles you run and what you need — we will come back with a recommendation and a price. Prefer to talk? Call 01656 721871.
4 August 2026
Monday to Friday:
8.30am-5.30pm